Sabtu, 14 Januari 2006

Book Review : Linux Quick Fix Notebook

I am always on the lookout for good books on Linux which covers system and network administration topics. So when I came across one of the Bruce Perens' Open Source Series books on Linux called "Linux Quick Fix Notebook" authored by Peter Harrison, I gave it a shot. At first I was a bit skeptical owing to my past experiences with books that claim to be all rounders in their respective field but which in reality covers the topic in shallow depth. But after flipping through a few pages, I marvelled at the sheer amount and depth of coverage of system and network administration topics.


This book positions itself as a System / Network administrator's guide to configuring and fixing various issues faced in Linux and so is a bit short on theory but more than makes it up by taking a hands-on approach in tackling these problems. It has everything from the basic configuration and trouble shooting to advanced security and optimization techniques.

Would you like to set up your own Wireless network, you can do it with ease by following the 13th chapter titled "Linux Wireless Networking". Or how about creating a complete website using Apache web server after setting up DNS, DHCP et al ? The author takes you through all these topics and more in this well structured book. This book is divided into three parts namely :
  1. Linux File Server Project - which gives a sound base on the introductory networking topics like a complete chapter on subnetting IP addresses - which interestingly has not been covered in any of the Linux books I have come across so far, setting up a NIC on Linux, Simple Network Troubleshooting, three chapters on Samba, configuring a DHCP server and more. This part includes 13 chapters.
  2. Linux Website Project - This is the second part of the book which contains 11 chapters and covers all the topics even remotely related to website hosting like setting up a firewall using iptables, setting up servers like FTP server, Apache web server, NTP server and mail server (sendmail), Monitoring server performance using MTRG and configuring DNS (both static and dynamic) and ...
  3. Advanced Topics - This forms the third part of this book and contains 11 chapters. This part deals exclusively with those topics in networking and system administration which are niche areas. These include a chapter on network based Linux installation, how to configure RAID (Redundant Array of Inexpensive Disks), managing disk usage through quotas, configuring NFS, NIS, LDAP and RADIUS, setting up a proxy server using squid, a chapter on Virtual Private Networking, modifying the kernel parameters to improve its performance and basic MySQL configuration details.
That is not all, the author has also included 4 appendices which can be considered to be chapters in their own right which covers those topics which did not fit in any other place in the book like using TCP wrappers to improve security, codes, scripts and configurations, examples of zone files for DNS configuration and so on. The author has also included a short section on Cisco routers and PIX firewalls and explains how to backup the configuration files of these hardware routers to a remote Linux server.

The Book at a glance
Because the book has over 35 chapters and 4 additional apendices, I will list the essential topics covered in this book instead of a chapter-by-chapter listing.
  • Software Installation
  • Network setup and troubleshooting
  • Samba for windows files on Linux servers
  • Linux-to Linux file sharing with NFS
  • Simple MySQL database administration
  • LDAP and NIS for centralized logins
  • FTP and SCP file transfers
  • Disk data redundancy with software RAID
  • Wireless Linux networks
  • MRTG server performance monitoring
  • Linux firewalls and VPNs
  • Squid for Web access control
  • Mail, Web, and DNS server setup
  • Websites on DHCP Internet links
  • Time synchronization with NTP
  • Error reporting with syslog
  • Restricting user's disk space usage with quotas
Book Specifications
Name : Linux Quick Fix Notebook
ISBN No: 0-13-186150-6
Author : Peter Harrison
Publisher : Prentice Hall (Professional Technical Reference)
No of Pages : Over 650
Price : Check at Amazon
Rating : Excellent

A word about the Author
Peter Harrison, the author of this book is a principal network engineer for a major Web-hosting company with over 20 data centers throughout North America and Europe. He has worked extensively with Linux in mission critical, high availability environments used by a number of Fortune 500 companies. He was founding president of PCJAM - Jamaica's first computer user group, and was principal systems engineer responsible for computerizing the island's tax collection and social security systems. He is a Cisco Certified Internetworking Engineer (CCIE).

Things I liked about this book
  • As the name indicates, this book is truly a hands on reference for any system or network administrator dealing in Linux. Each topic is dealt with by giving practical how-to kind of examples and all the person has to do is execute the commands the same way that has been given in the book.
  • The topics are explained in a simple and lucid manner keeping complex jargon to a minimum.
  • The chapters have a logical flow of information starting with concise backgrounders and ending with a troubleshooting section.
  • Each chapter is a complete entity in its own right and so it is not necessary to read the book from cover to cover. You can easily jump to the section you are interested in and carry on from there. For example, if you are interested in configuring RAID on your machine, you can directly flip to the chapter dealing in RAID (chapter 26) and start reading from there thus saving a lot of time.
  • Configuring and setting up various packages and services is explained using command line method, which I believe is a plus point as far as the topic of system and network administration in Linux is concerned.
  • This book addresses the real issues that systems administrators encounter when working with Linux.
The only thing I found a bit of a drawback was that the author has used the Red Hat way of configuring things all through out the book. So starting and stopping services is explained using the 'chkconfig' and 'service' scripts through out the book. Installing packages is explained using 'rpm' and so on. And a person using a non Red Hat distribution will feel a bit disoriented at first.

But that does not bring down the value of the book at all. Taking into consideration the sheer amount of topics covered and their depth, I can't fail to notice that it is a book worthy of being a companion to any professional system or network administrator in Linux.

Benchmark : Performance comparisons of various Filesystems under Linux

If you are asked to list the types of filesystems supported in Linux, I am sure you will be able to list quite a few of them. But when it comes to listing the pros and cons with respect to the performance of these filesystems in Linux, one is not so sure right? This may be because not many have benchmarked these filesystems and published their findings online.

Now things have changed though, because Justin Piszcz has written a two part series listing his findings regarding how each filesystem fared performance wise under Linux. He has published his findings for Linux kernel 2.4 as well as 2.6 .

The filesystems that were included in the benchmark were EXT2, EXT3, JFS, ReiserFS v3, ReiserFS v4 and XFS . To arrive at a conclusion, he performed 17 different tests which included creating 1000's of files on the filesystem and cat'ing a huge file (1 GB) to /dev/null among other things.

So what is the verdict ?
The author has concluded that XFS is the best filesystem in terms of performance and scalability though JFS has improved in some of the tests. And the surprise of all, ReiserFS is the slowest in most of the tests. But I think it would be prudent to read the article first and arrive at your own conclusions.

Kamis, 12 Januari 2006

Creating and compiling Qt projects on the command line

Anyone who has used KDE will know that most of the UI interface in KDE as well as the KDE specific applications have been developed using the Qt tool kit. Qt consists of a set of libraries written in C++ language which aids the developer in creating robust well designed GUI applications in the shortest period of time. Qt is developed by a Norwegian company called Trolltech and is released under two separate licences. For the Linux and Windows platform, there is the GPL licence and it also sells the library under a commercial licence for the Windows platform if developers want to use it to create proprietary applications.

The advantages of Qt
  • Cross platform support
  • Free if you are creating GPLed applications.
  • Very less complexity unlike other libraries such as MFC.
  • A unique way of communication between user interfaces using Signal - Slot mechanism.
  • A rich collection of ready made widgets which reduce the development time drastically.
There are good GPLed UI designers available for the Linux platform like the Qt Designer, KDevelop Designer, Kommander Editor and so on to design the applications just like you do in Visual Basic in the windows counterpart.

Here is a simple method of creating a Qt project using command line:

The listing below shows a simple program which when compiled and run will display a label with the words "Linux is wonderful" inside its own window. If you want to try it out, copy the code shown below into a text editor and save it as test.cpp . You can give it any name.
#include <qapplication.h>
#include <qlabel.h>

int main(int argc, char *argv[])
{
QApplication app(argc, argv);
QLabel *label = new QLabel("Linux is wonderful", 0);
app.setMainWidget(label);
label->show();
return app.exec();
}

The .cpp extension tells us that it is a C++ file. For the uninitiated, you compile the C++ programs using g++ compiler which is installed by default in most Linux distributions. But commonly, you use a file by name MakeFile which directs the compiler to compile your programs. And all you have to do is move into the directory containing the MakeFile and your program, and execute the command make.

$ make
So to compile the above program, you have to create a MakeFile first. Qt has a easy way of generating a MakeFile. This is how you do it.

First you move into the directory containing your code - in our case test.cpp .
While in this directory, create a Qt project as follows:
$ qmake -project
This will create a project called test.pro and include our program test.cpp into it.

Now execute the following command to create a platform specific MakeFile :

$ qmake test.pro
At this stage if you do a listing of the contents of the directory, you will find a file by name MakeFile .

To compile our program, it is now as simple as running the make command.

$ make
After running make, you will find a executable file by name test in your directory which when run will display the label in a window.

$ ./test
This is one way of compiling a simple project which gives us an idea of how the compiling takes place. For complex projects, you usually use specialised editors like KDevelop which automates the creation of the project and the compilation.

Senin, 09 Januari 2006

Xfce 4.2 - A light weight window manager heavy in features.

The first time I used Xfce was when I tried out the Belenix Live CD. Xfce was the only window manager bundled with it so I had no choice but to use it though my personal preference was Fluxbox. But after playing around in it for some time, I just couldn't stop admiring the usability and design of Xfce as well as the responsiveness of the applications when run in it.

So the first thing I did was to install it in Linux and take it for a test drive. And the things I found out were really interesting. For one, Xfce is not just any window manager out there but it is a desktop in its own might. It comes bundled with applications like its own light weight xterminal, a file manager, desktop configuration utilities, a light weight mail client, a media player and optional utilities like a calender similar to those that pop up in KDE and Gnome when you click on the clock in the panel and a very cool lightweight text editor.

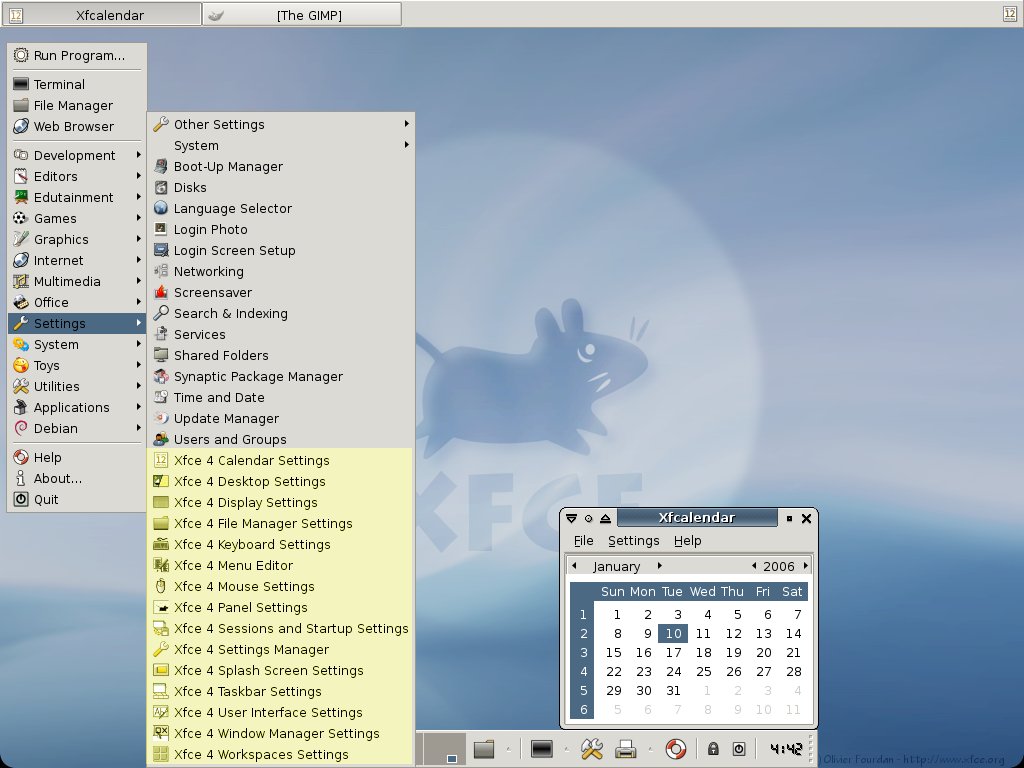
Fig: Xfce Desktop - Note the highlighted menu and the calender

But what sets Xfce apart from the more popular heavy weights like Gnome and KDE is its very low memory foot print. In fact, in the developer's own words, the aim of Xfce is to be a simple, light and efficient environment which is easy to use and configure, stable, fast and at the same time visually appealing. And not to speak of a clean desktop. In fact, I found out that the desktop is a separate utility which goes by the name xfdesktop and the user has the option of not running it in Xfce if he chose to.

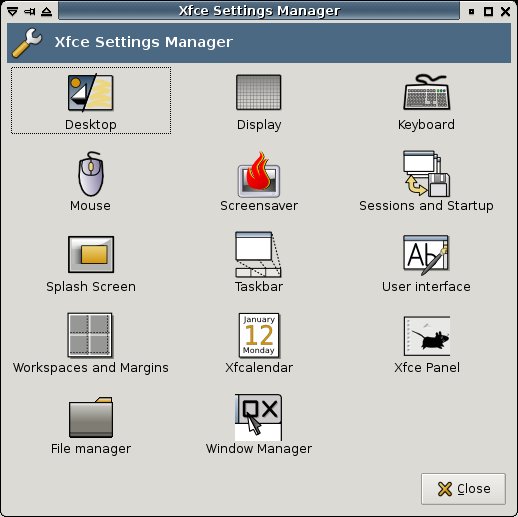
Fig: You can configure most of the features from the Xfce settings manager

Another aspect which endeared me to this light weight window manager cum desktop is that when you install or uninstall any software in Linux, the menus in Xfce are automatically updated to mirror the change which is a comfortable feature which is lacked by other light weight window managers including popular ones like Fluxbox.

In my opinion, it would be a good idea to install another light weight file manager called 'Rox' along side Xfce which I believe integrates quite well with the Xfce desktop.

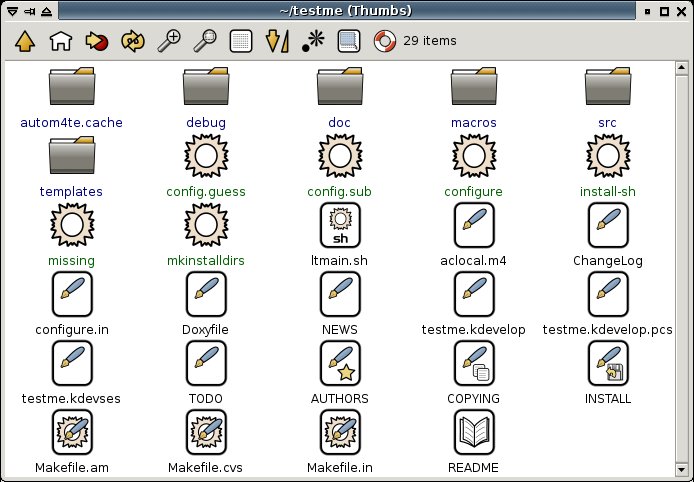
Fig: Rox file manager in action

If you are using a Debian based Linux distribution, installing rox is as simple as executing the command:
# apt-get install rox
I recommend using Rox file manager with Xfce because it is quite easy to associate file types with the applications of our choice in rox and it is blazing fast.

Software bundled with Xfce
  • xffm - The light weight file manager
  • xfdesktop - Enables menus to pop up when right clicked on the desktop.
  • xfce-settings-show - Xfce settings manager, where you configure the desktop settings, keyboard, mouse, xfpanel.
  • xfce4-panel - The Xfce4 panel.
  • xfce4-menueditor - A useful widget to edit the menu entries in Xfce4.
  • xfmail - A light weight mail client.
  • xfmedia - A utility to play audio files.
  • xfcalendar - This is an optional widget which gives a compact monthly calendar similar to those found in KDE and Gnome.
  • xflock4 - Activates the screensaver and locks the display.
  • xfrun4 - Run application command dialog box. Can be activated by using key sequence [Alt+F2] .
  • xfhelp4 - Opens the Xfce4 documentation in the default web browser.
  • xfce4-terminal - This is actually a script which runs the ubiquitous xterm but with better configuration. See this link for more details.
  • mousepad - A light weight text editor. (Has to be installed separately).

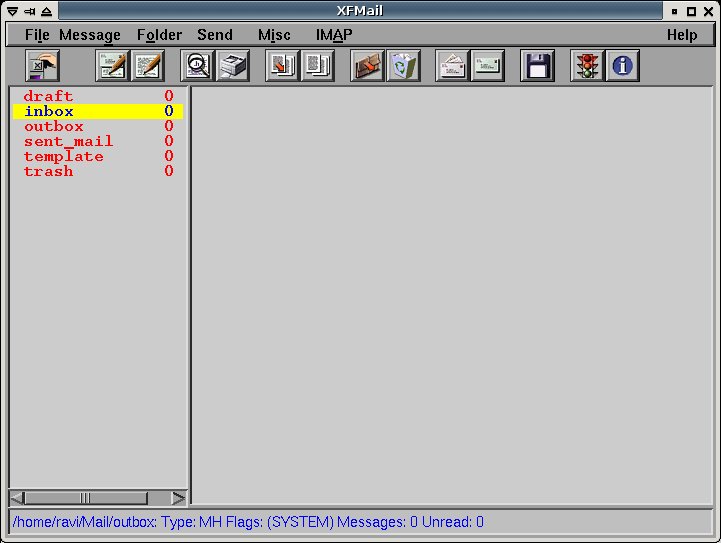
Fig: xfmail - a light weight email client


Fig: A beautiful Xterminal

And if you are usually booting into run level 2 or 3 and then starting a window manager using the startx command, then you may make Xfce the default window manager by creating a hidden file by name .xinitrc in your home directory and entering the command startxfce4 in it as follows:
$ touch .xinitrc
$ echo "startxfce4" > .xinitrc

$ startx
One thing that I found really annoying though is that when I start nautilus (the Gnome file manager), it overlaps my xfce desktop and I stop getting the xfce menus when I right click on the desktop. I figured a work around here in that by using the --no-desktop flag, I was able to circumvent this problem.
$ nautilus --no-desktop
After using this light weight window manager (version 4.2.2) for a week now, I am so impressed by it that I have made it my default window manager in Linux.

Jumat, 06 Januari 2006

Input/Output redirection made simple in Linux

Linux follows the philosophy that every thing is a file. For example, a keyboard, monitor, mouse, printer .... you name it and it is classified as a file in Linux. Each of these pieces of hardware have got unique file descriptors associated with it. Now this nomenclature has got its own advantages. The main one being you can use all the common command line tools you have in Linux to send, receive or manipulate data with these devices.

For example, my mouse has the file descriptor '/dev/input/mice' associated with it (yours may be different).

So if I want to see the output of the mouse on my screen, I just enter the command :
$ cat /dev/input/mice
... and then move the mouse to get characters on the terminal. Try it out yourselves.

Note: In some cases, running the above command will scramble your terminal display. In such an outcome, you can type the command :
$ reset
... to get it corrected.

Linux provides each program that is run on it access to three important files. They are standard input, standard output and standard error. And each of these special files (standard input, output and error) have got the file descriptors 0, 1 and 2 respectively. In the previous example, the utility 'cat' uses standard output which by default is the screen or the console to display the output.
  • Standard Input - 0
  • Standard Output - 1
  • Standard Error - 2
Redirecting output to other files

You can easily redirect input / output to any file other than the default one. This is achieved in Linux using input and output redirection symbols. These symbols are as follows:
> - Output redirection
< - Input redirection
Using a combination of these symbols and the standard file descriptors you can achieve complex redirection tasks quite easily.

Output Redirection
Suppose, I want to redirect the output of 'ls' to a text file instead of the console. This I achieve using the output redirection symbol as follows:
$ ls -l myfile.txt > test.txt
When you execute the above command, the output is redirected to a file by name test.txt. If the file 'test.txt' does not exist, then it is automatically created and the output of the command 'ls -l' is written to it. This is assuming that there is a file called myfile.txt existing in my current directory.

Now lets see what happens when we execute the same command after deleting the file myfile.txt.
$ rm myfile.txt
$ ls -l myfile.txt > test.txt
ls: myfile.txt: No such file or directory -- ERROR
What happens is that 'ls' does not find the file named myfile.txt and displays an error on the console or terminal. Now here is the fun part. You can also redirect the error generated above to another file instead of displaying on the console by using a combination of error file descriptor and output file redirection symbol as follows:

$ ls -l myfile.txt 2> test.txt
The thing to note in the above command is '2>' which can be read as - redirect the error (2) to the file test.txt.

Fig: Two open xterms can be used to practice output redirection.

I can give one practical purpose for this error redirection which I use on a regular basis. When I am searching for a file in the whole hard disk as a normal user, I get a lot of errors such as :
find: /file/path: Permission denied
In such situations I use the error redirection to weed out these error messages as follows:
# find / -iname \* 2> /dev/null
Now all the error messages are redirected to /dev/null device and I get only the actual find results on the screen.

Note: /dev/null is a special kind of file in that its size is always zero. So what ever you write to that file will just disappear. The opposite of this file is /dev/zero which acts as an infinite source. For example, you can use /dev/zero to create a file of any size - for example, when creating a swap file for instance.

If you have a line printer connected to your Linux machine, and lets say its file descriptor is /dev/lp0 . Then you can send any output to the printer using output redirection. For example to print the contents of a text file, I do the following:

$ cat testfile.txt > /dev/lp0
Input Redirection
You use input redirection using the less-than symbol and it is usually used with a program which accepts user input from the keyboard. A legendary use of input redirection that I have come across is mailing the contents of a text file to another user.

$ mail ravi < mail_contents.txt
I say legendary because now with the advances in GUI, and also availability of good email clients, this method is seldom used.

Suppose you want to find the exact number of lines, number of words and characters respectively in a text file and at the same time you want to write it to another file. This is achieved using a combination of input and output redirection symbols as follows:

$ wc < my_text_file.txt > output_file.txt
What happens above is the contents of the file my_text_file.txt are passed to the command 'wc' whose output is in turn redirected to the file output_file.txt .

Appending data to a file
You can also use the >> symbol instead of output redirection to append data to a file. For example,
$ cat - >> test.txt
... will append what ever you write to the file test.txt.

Kamis, 05 Januari 2006

BIOS - Basic Input Output System

You take any PC out there, and you can be sure that it houses a BIOS chip. BIOS is an acronym which stands for Basic Input Output System. You have various companies like Award, Phoenix and the likes which manufacture BIOS chips and your machine will most probably be using a BIOS chip from one of these companies.This ubiquitous chip is the starting point of the booting process in your computer which eventually loads a fully functional operating system. If there is no BIOS chip, then your machine will not boot - irrespective of the type of OS you are using (this might change in the future when flash memory gets cheaper and its use becomes more prevalent).

Knowing how to set the parameters in a BIOS becomes important when you want to tweak the performance of your CPU or change the boot sequence to boot from the CD ROM rather than the hard disk.

Andreas Winterer has written an in depth article on BIOS named BIOS A to Z which gives a well rounded view of the BIOS chip. The article is divided into 4 broad parts namely :
  • The Basics - Which introduces the reader to the different BIOS versions, how to access your BIOS menu, manipulating the BIOS settings, a brief overview of the various menus of a typical BIOS setup program and also how to come out of the BIOS session after you have made the changes to the settings.
  • Key Settings - This section deals with how you can change the boot priority order on your computer, start a desktop PC with a key press or a mouse click, activate support for USB 2.0, and handle problems with fans or hardware changes.
  • BIOS Tuning - I am sure you have heard stories of how some people over clock their processor.And if you are curious of how they achieved it, then this section throws light on this subject. Here the author explains how to speed the system boot-up to the maximum, accelerate graphics cards, make the fullest use of your CPU power, tune motherboard chipsets and squeeze more performance out of your RAM.
  • BIOS Update - From time to time, your BIOS chipset manufacturer will release newer versions of their BIOS programs. These updated programs will optimize existing hardware and may also introduce new functions. This section gives the steps to be followed in successfully updating your BIOS program to the latest version. This is popularly known as flashing your BIOS.
Finally the author ends this very complete article by listing 5 golden rules to be followed to help stay out of trouble while playing with the BIOS settings.

This guide is a must read for all people interested in knowing more about the BIOS and how to tweak its settings to achieve better hardware performance.

Rabu, 04 Januari 2006

10 things you should know about every Linux installation

I still remember the first time I had to use a non-windows operating system. I couldn't make head or tail of how to navigate the file hierarchy. It was so different from the working of windows that I had to overcome a steep learning curve. But once I mastered the Linux way of working and its file hierarchy, I felt that it was (and is) a robust operating system and has very many advantages over the windows OS.

Jeffery.G.Thomas has writen an insightful article which details the ten things one should know about every linux installation.