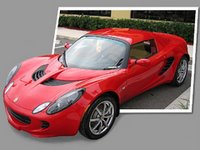
 Gimp is a versatile image editor. I have been using Gimp exclusively for editing images and photos targeted for the web. Over and above its usefulness, it is also a Free software. But when it comes to finding tutorials in creating special effects of photographs, you find a whole lot of them for Adobe's Photoshop but not that many for Gimp. This could be because there is a whole industry that has been spawned by Photoshop and which depends on it for its survival.
For instance, there are a plethora of books on Photoshop, professional videos, exclusive Photoshop training institutes and even Photoshop magazines. Compared to that, Gimp lacks any of these baring a couple of books which can be counted with your fingers. But one thing which Gimp has as much as Photoshop is a very strong community backing it, a community which understands the true strengths of this Free graphics suite and use it exclusively for creating and editing images targeted for the web.
In recent times, with GNU/Linux and Free software getting increasing exposure among the masses, some of it has also rubbed off Gimp and now you find more tutorials on accomplishing special tasks using Gimp than you found earlier.
Andrew of 'Instructables' fame has written an excellent tutorial which shows how to create a 3D effect from a photo of a car which is really informative. But what is even better is that for a change, he explains how to do it using the Free software Gimp.
Tidak ada komentar:
Posting Komentar